Ever felt like you need to be a ‘natural’ to create cool drawings? Well, that’s just not true. Impressive pencil art is more about learning simple techniques than raw talent.
In this article, I promise to give you step-by-step instructions for creativo dibujos a lapiz faciles y chidos that even a total beginner can be proud of. With just a pencil and paper, you’ll learn the foundational skills to draw anything you want.
Gathering Your Gear: The Only 3 Tools You Really Need
You might think you need a ton of fancy art supplies to start drawing. Let me tell you, that’s just not true. (Simplicity is key here.)
First up, the pencil. A standard #2 (HB) pencil is great for everyday use. But if you want to take your shading to the next level, get a softer 2B and a harder 2H pencil.
These can make a huge difference in the range of tones you can achieve.
Next, let’s talk about paper. Grab a simple sketchbook with smooth paper. (Not printer paper, please.) The texture matters because it affects how well you can blend and shade.
Smooth paper gives you a clean, even surface to work on.
The third essential tool is the eraser. A standard rubber eraser is fine for most jobs, but a kneaded eraser is a game-changer. It can lift graphite subtly and highlight areas without leaving harsh marks.
(Trust me, it’s worth it.)
Pro tip: Keep your drawing clean by placing a spare sheet of paper under your drawing hand. This prevents smudging and keeps your work looking sharp.
By focusing on these three tools, you can create creativo dibujos a lapiz faciles y chidos without breaking the bank. Plus, you’ll have everything you need to start practicing and improving your skills.
The Secrets to Making Simple Shapes Look Amazing
I remember when I first started drawing. Everything looked flat and lifeless. But then I learned a simple truth: all complex objects are made of basic shapes like spheres, cubes, and cylinders.
The #1 technique for adding realism is shading. It’s amazing how a single pencil can create a value scale from light to dark. Start by pressing lightly for the lightest tones, then gradually increase pressure for darker areas.
Practice this on a piece of paper until you get a smooth transition.
Now, let’s apply this to a sphere. Draw a circle and add a core shadow on one side. This is the darkest part where the light doesn’t hit.
Add a highlight on the opposite side, which is the brightest spot. Finally, draw a cast shadow below the sphere. This makes it look 3D.
Another key technique is line weight. Varying the pressure on your pencil to create thick and thin lines can make a drawing pop. For example, use thicker lines for the edges that are closer to you and thinner lines for the parts that recede into the background.
Here’s a simple exercise: draw three cubes. Use different shading and line weight techniques on each. You’ll see a dramatic difference.
One cube might have heavy shading and thick lines, while another has light shading and thin lines. The third could be a mix of both.
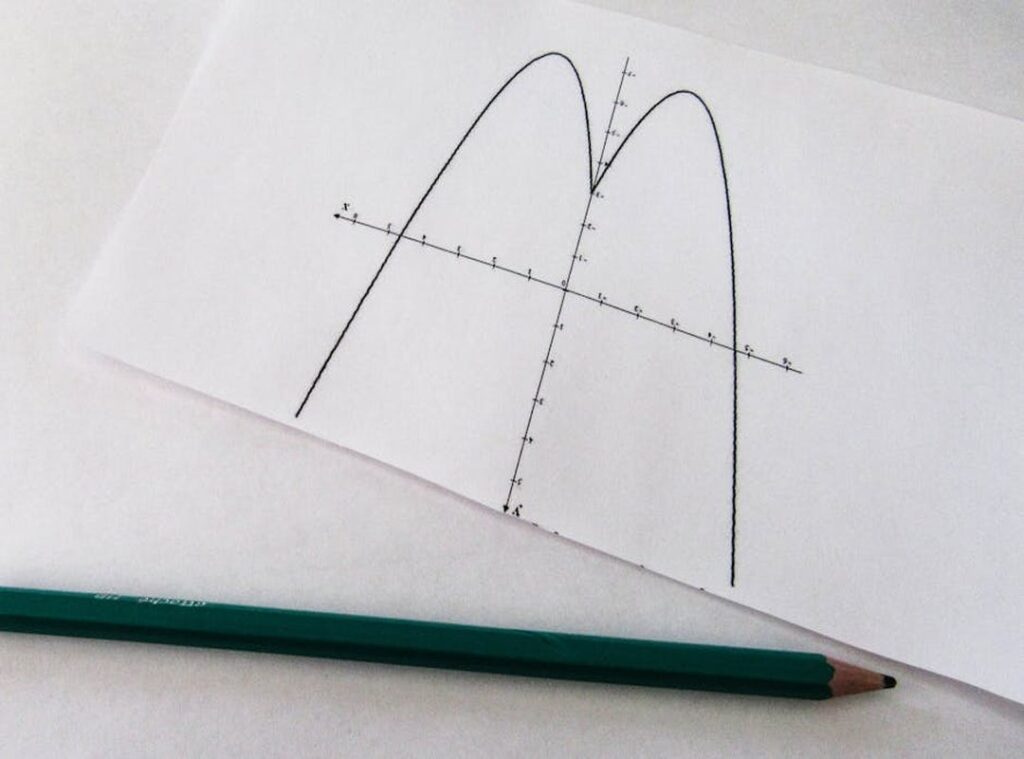
Briefly, let’s touch on perspective. A one-point perspective is great for adding depth. Imagine drawing a simple road or hallway.
All the lines converge at a single point on the horizon. This creates a sense of distance and depth.
Try these techniques and watch your drawings transform. Remember, practice makes perfect. And if you’re looking for some inspiration, check out creativo dibujos a lapiz faciles y chidos for some cool and easy pencil drawings. creativo dibujos a
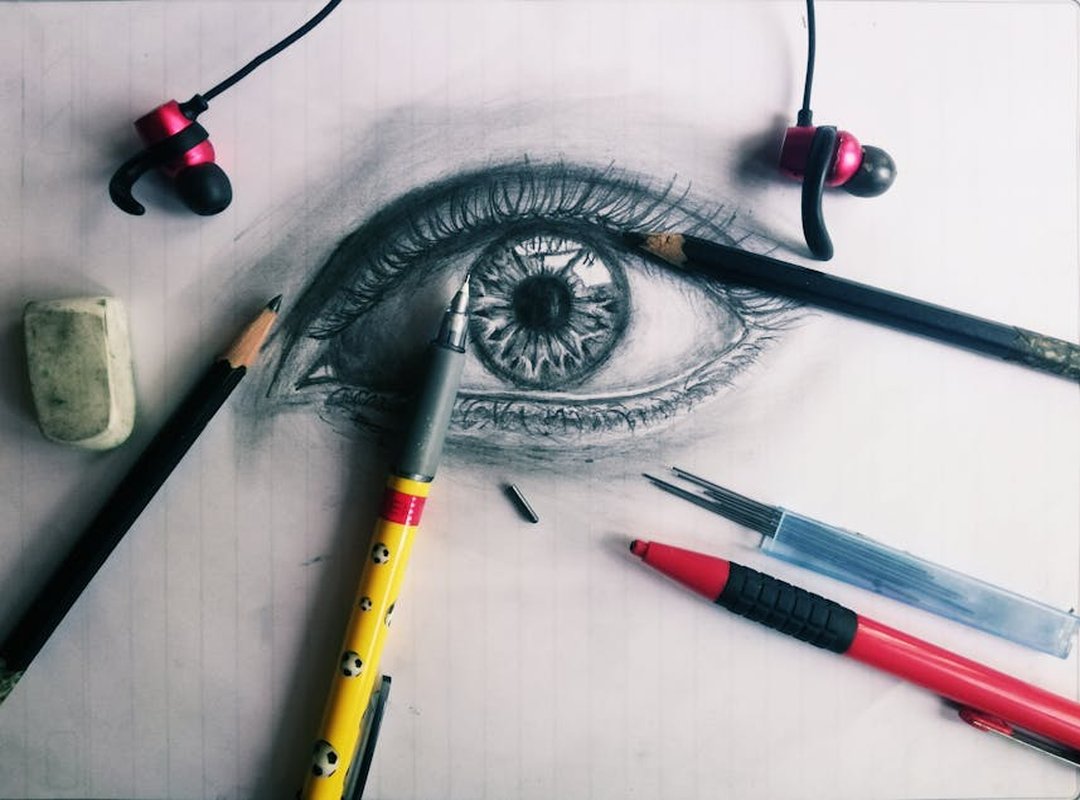
Step-by-Step Guide: Drawing a Realistic Eye That Wows
Start with an anecdote about the first time I tried to draw an eye. It was a disaster. The iris looked like a lopsided pizza, and the eyelashes were more like a porcupine’s quills.
But hey, we all start somewhere, right?
Introducing the Project
Drawing a stylized but realistic eye is a classic subject that looks complex but is based on simple shapes. It’s a great way to practice your skills and add some wow to your sketches.
Step 1: Basic Shapes
Begin with the basic almond shape for the eyelid and a circle for the iris. Emphasize light construction lines. This step is crucial; it sets the foundation for everything else.
Step 2: Adding Details
Add the pupil, the upper eyelid crease, and the tear duct. Block in the basic shape of the eyebrow. These details give the eye its structure and help it look more lifelike.
Step 3: Shading the Iris
Begin shading the iris, leaving a small white circle for the highlight. Show how to draw lines radiating from the pupil to create texture. This step adds depth and makes the eye pop.
Step 4: Shading the Sclera
Shade the ‘white’ of the eye (sclera). Explain that it’s never pure white but has subtle shadows in the corners to make it look round. This little detail can make a big difference.
Step 5: Detailing the Eyelashes
Detail the eyelashes, explaining how to draw them in curved clumps rather than straight, individual lines for a more natural look. This technique gives the eye a softer, more realistic appearance.
Creativo dibujos a lapiz faciles y chidos, this project is a fun and rewarding way to improve your drawing skills. With a bit of practice, you’ll be wowing everyone with your realistic eyes.
Your Next Challenge: Creating a Cool 3D Crystal Cluster
Alright, let’s dive into something fun and creative. Your next project is a cluster of geometric crystals. Trust me, it’s very forgiving for beginners and looks super chido.
First things first. Draw a series of overlapping, angular shapes like triangles, rectangles, and polygons. These will form the basic crystal outlines.
It’s all about getting those sharp, clean lines.
Next, define the facets within each crystal. How? By drawing lines from the corners to a central point.
This step is key to making your crystals look three-dimensional.
Now, apply shading. Pick a light source and shade the facets facing away from the light darker. The ones facing the light should be lighter.
This creates that cool 3D effect.
For a final touch, use a sharp eraser to create bright, hard-edged highlights on the crystal edges. This makes them look shiny and sharp.
This project is perfect for anyone looking to try creativo dibujos a lapiz faciles y chidos. It’s not just about following steps; it’s about seeing your creativity come to life in a way that’s both impressive and easy to achieve.
Keep the Creativity Flowing
You’ve just mastered some fundamental skills: basic shading, line weight, and constructing objects from simple shapes. These are powerful tools in your artistic arsenal. You’ve completed two cool drawings, proving that you have a repeatable process for creating more.
creativo dibujos a lapiz faciles y chidos is within your reach. Fill a sketchbook page with simple shaded shapes or try drawing another object using the techniques from the tutorials. Practice is the key to unlocking even more creative potential.